

Trolley sleeve compatibility requires straightforward installation, secure seating on the case and room to hold and operate the handle. With a closed slide-over sleeve, the grip must first pass through its opening; an openable strap takes a different route. The loaded combination then needs to work properly in motion. Getting the bag onto the handle is only the first part of approving a luggage-and-bag set.
For a brand’s product manager, designer or sourcing team, resolve this pairing before approving the two products separately. Establish which features must stay, then decide whether to change the sleeve, the bag’s position or the handle configuration. Here is how to approach that work from the suitcase side and give both development teams a clear fit target.
Why tube spacing alone does not tell you whether a sleeve will fit
A trolley sleeve, also called a luggage pass-through, is the channel on a travel bag that accepts a suitcase handle. It may be a sewn band, a fabric sleeve or a pocket that opens at both ends. With a closed sleeve fitted from above, the route is over the grip, down the two tubes and onto the case.

The clear gap between the tubes, the span across their outer edges and the grip’s overall width are different measurements. Grip ends can extend beyond the tubes. Designing the sleeve around the gap between them can leave an apparently generous opening that catches at the very first step.
Width is not the only constraint. The grip has thickness, rounded ends and transitions that the flexible opening must pass around. Two grips with similar overall widths can behave differently in the same sleeve. Compare their profiles during selection, then trial the complete grip in the finished sample. A flat strip of the same width does not reproduce that fit.
On the bag, specify the finished usable opening. Cut-panel width includes seam allowances; binding, padding or a zipper at the lower end may also occupy the passage. A wide piece of fabric does not necessarily provide an equally wide opening. For a pass-through pocket, check both exits with the relevant zippers fully open as intended in use.
For the fit record, photograph the grip from the front and side and record its maximum width and thickness. Mark where each sleeve opening is measured and how the bag is supported during measurement; record the opening without forcibly stretching the fabric. Use the same method on revised samples. These measurements locate differences, while fitting the finished bag over the actual grip—empty and with the intended contents—confirms the passage.
Record where insertion first stops. Catching at the grip ends points to the opening and end profile. Passing the grip but stopping farther down calls for inspecting the lower seam, zipper or contact point. Locating the interference gives the development team a specific change to make.
A larger opening can ease installation while allowing more sideways movement once fitted. Resolve clearance and location together. Define where and how the finished opening is measured, along with its tolerance. Establish the allowance through the actual material, construction and sample pairing rather than applying one supposedly universal sleeve size.
Check where the bag rests, then where the hand goes
For a bag designed to sit on the case while its sleeve limits movement, support underneath and location at the back work together. The bag should reach its intended resting position. If the sleeve catches while the bag is still suspended above the case, the load is being carried differently. Find the obstruction instead of pressing the bag down harder.
Once seated, look at the actual contact underneath. The top carry handle, a raised shell profile or fittings around the trolley tubes can leave the bag supported only in places and leaning to one side. Tightening the sleeve cannot create a suitable resting surface. The useful change may be to the bag base, its orientation or the selected case.

Next, hold the grip and operate the release button at each locking position intended for the pairing. Separate grip height above the floor, which affects the rolling posture, from the remaining clearance around the fitted bag, which affects hand and button access. A space that looks generous on an empty-case photograph may disappear behind a packed top compartment.
If the bag obstructs the hand, compare changes to bag height, sleeve position, riding orientation or handle position. These choices interact. Moving the sleeve changes where it engages the tubes; it does not necessarily lower the top of a bag whose base already rests on the case. Extending the handle farther may provide clearance, but the resulting grip height must also suit the intended user.
Treat a backpack riding sideways as a complete configuration. Its attachment orientation, heavy contents, zipper access and hanging shoulder straps all change position. The customer needs to fit it, roll it, reach its contents and remove it conveniently, rather than simply reproduce a photograph.
Choose the change around what the collection needs to retain
Tell both development teams which features are already approved and which remain adjustable. Otherwise, the case team may narrow the grip while the bag team enlarges the opening, with neither working toward an agreed pairing.
Keeping the case: develop the bag around the real handle and case top
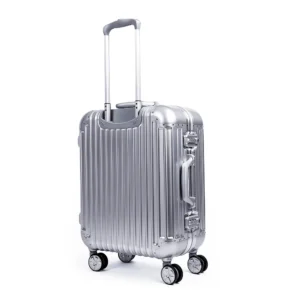
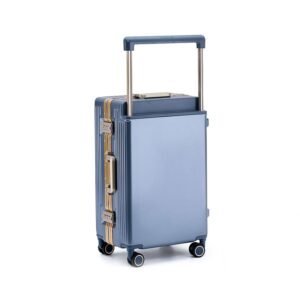
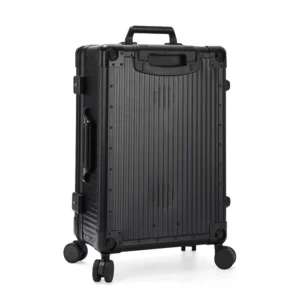
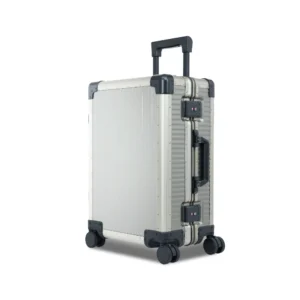
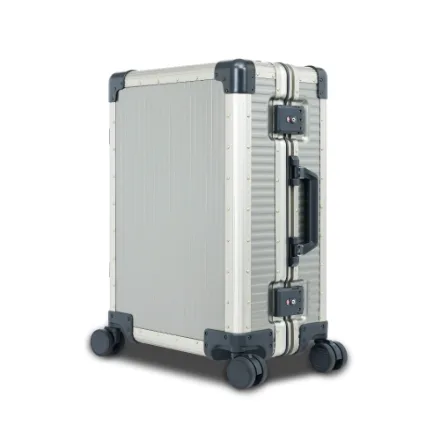
If the collection has selected a wide-handle case such as our TS-005 aluminum suitcase, use its grip profile, available locking positions and upper contact surfaces as inputs for the matching bag. Work through the sleeve opening and position, followed by base support and hand clearance with the bag packed. Preserve the approved case concept while developing the unfinished attachment.
Keeping an existing bag: use the finished bag to select the case
For a bag already in production, its finished sleeve and loaded shape are practical constraints. Compare candidate cases using the same bag. Eliminate combinations that cannot pass the grip, then compare seating, hand access and rolling. A tube-spacing measurement from the case factory is insufficient; a physical bag sample lets the case team locate the interference directly.
If a handle change is needed, review the assembly. A different grip may require a different connection interface; changing tube spacing can affect guides, mounting points and the internal layout. Separate an existing component substitution from development that changes the mounting structure when quoting and approving the work. An exterior drawing alone cannot establish interchangeability.
Developing both: prove the functional pairing before fixing both sets of dimensions
Define the intended case-and-bag combinations, riding orientation and representative loads. Use functional samples to establish the installation route, resting position and hand clearance, then carry those relationships into both drawings. Colors and decoration may still change, while the opening, grip and mounting positions that govern fit are managed together.
For example, a brand may want to retain both a wide-grip appearance and an existing travel bag. First establish whether the actual opening passes the grip. If it does not, compare three options: revising the bag’s back panel, using an openable attachment or selecting a different case configuration. That produces defined development options instead of an unspecified request to make everything universal.
What an openable strap changes—and what still needs to work
A closed sleeve requires the grip to pass through it. An openable strap can be fastened around the handle after the bag is positioned. This changes the installation route and is worth comparing when a wide grip must be retained.
Choose around the customer’s routine. A built-in sleeve is always present and offers a straightforward fitting action. An adjustable attachment allows the fit to be tightened, but adds fastening, adjustment and management of the loose end. A separate strap also needs to be carried and stored. Weigh those actions against the adjustment the product actually needs.
With a strap, assess access to the buckle, whether the adjustment holds, how the strap attaches to the bag and where the free end hangs relative to the wheels. For a single-pole handle, assess rotation around that pole separately; positioning on a two-pole handle does not establish the same behavior.
Also distinguish a bag resting on the case from one suspended from a hook. Suspending the bag changes how its weight reaches the fitting and case. A change to that arrangement requires a corresponding review of the attachment and loading, rather than carrying over the sleeve arrangement’s approval.
When the loaded set moves, identify which part is moving
An empty trial finds geometric interference. A packed trial reveals the bag’s working shape and handling. Use the intended laptop, or an equivalent in size and mass, for a laptop bag; pack a travel bag for its intended use. Record the load, its placement and the handle position so a revised sample is compared under the same conditions.
Distinguish the bag moving relative to the case from the whole combination leaning or tipping. The first directs attention to location, clearance and support. The second also requires looking at load placement and the combined support footprint. Moving a heavy upper load forward or sideways shifts the combined center of gravity. Tightening the sleeve alone may leave that balance problem unchanged.
| What happens | Where to look and what to change |
|---|---|
| An empty bag fits, but a packed bag is hard to install or remove. | Compare the channel shape, back-panel bulging and contact points. Address the occupied clearance or obstructed installation route. |
| The bag slides sideways while the case remains steady. | Check sleeve clearance, attachment position and base support. Improve location in the direction of movement. |
| The bag and case lean forward together or tip after stopping. | Check load distribution, bag overhang and light/heavy packing combinations. Compare a revised internal loading arrangement or pairing. |
| Straight rolling is satisfactory, but turns or surface joints cause displacement. | Repeat the same route and load. Observe attachment slipping or loss of contact beneath the bag, then revise the responsible feature. |
| Repeated use produces rubbing marks or seam changes. | Locate repeated contact and pulling. Review edge finishing, connections and reinforcement, then validate the revised finished assembly. |
Include the actual sequence of use: fitting and removing the bag, holding and unlocking the handle, rolling straight, turning, stopping and crossing the surface joints expected in use. If the suitcase is intended to be used both lightly packed and fully packed, evaluate the loaded upper bag with both. One heavily loaded demonstration on a smooth floor does not cover those configurations.
Define a successful functional pairing before comparing samples. The bag installs and comes off without forced stretching or distortion; the grip and button remain usable and the handle locks at the approved positions. During the agreed route, the bag stays on its intended support, the set remains controllable, and no loose strap catches a wheel. If a revision solves insertion but creates movement, hand obstruction or instability, the pairing still needs work. Record the conditions alongside the result so both teams judge the same behavior.
Follow functional trials with the relevant strength and durability work. Sleeve seams and attachments, adjusters, the trolley mechanism and contact wear during repeated use present different questions. The brand, factory and testing provider should establish loads, actions, cycles and acceptance requirements around the project’s use before testing. Existing handle or suitcase reports can support the parts they cover; the connection introduced by the case-and-bag pairing still needs to be included in validation.
Approve a pairing that production can reproduce
For a collection with several case sizes and bags, approve the combinations intended to be sold together. Grip profiles, extended heights and upper case contours may differ. A bag that works on one model does not establish fit across the entire range.
Put the case model and size, handle version, bag pattern, attachment construction, riding orientation and usable locking positions in the same pairing record. Retain photographs of the correct fit and the loaded validation results. Give both teams the same revision so production has a defined combination to maintain.
Bulk controls should follow that interface: verify the bag’s finished opening and attachment position, verify the case’s grip and handle configuration, and check assembled pairings at the agreed inspection level. Retaining one sample that just fits is insufficient; carry the controlling dimensions, tolerances and inspection method into production. Revisit affected pairings after a grip replacement, bag-pattern revision or sleeve construction change.
Base product information on those confirmed combinations. Show the installation orientation, supported configurations and whether an additional attachment is included. Sales, service and production can then work from the same meaning of compatibility.
When planning an Aluvox private-label luggage collection, bring the matching bag sample or finished drawing into the case discussion and identify the features already fixed on each product. Send us your case-and-bag requirements. Starting with the case configuration and available mounting space, we can define the fit questions for both development teams to resolve together.